When a visitor submits a contact form on your WordPress website, it’s important that you provide a clear success message to confirm that the message was successfully sent. Learn how to change color and style the success message in the Divi Form Module.
In this example I’m using a contact form from the Ebook Layout Pack from Elegant Themes. But the styling tricks will work regardless of your Divi layout. We will use basic Divi Builder functionality combined with some custom CSS. Here we go!
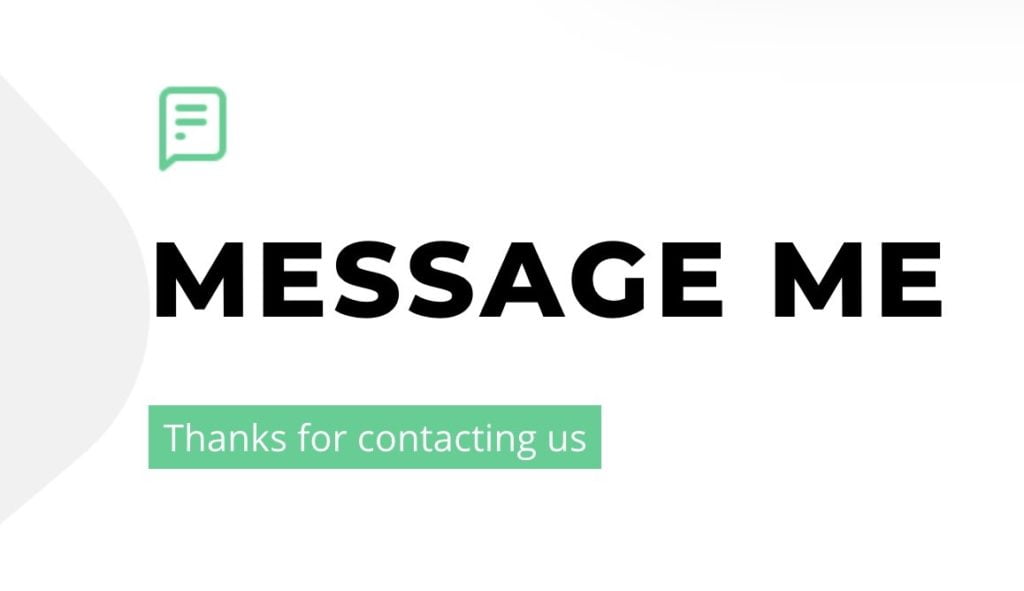
Before (default success message)
The default Divi Form success message font is small, grey and easy to miss.
1. Write your Success Copy
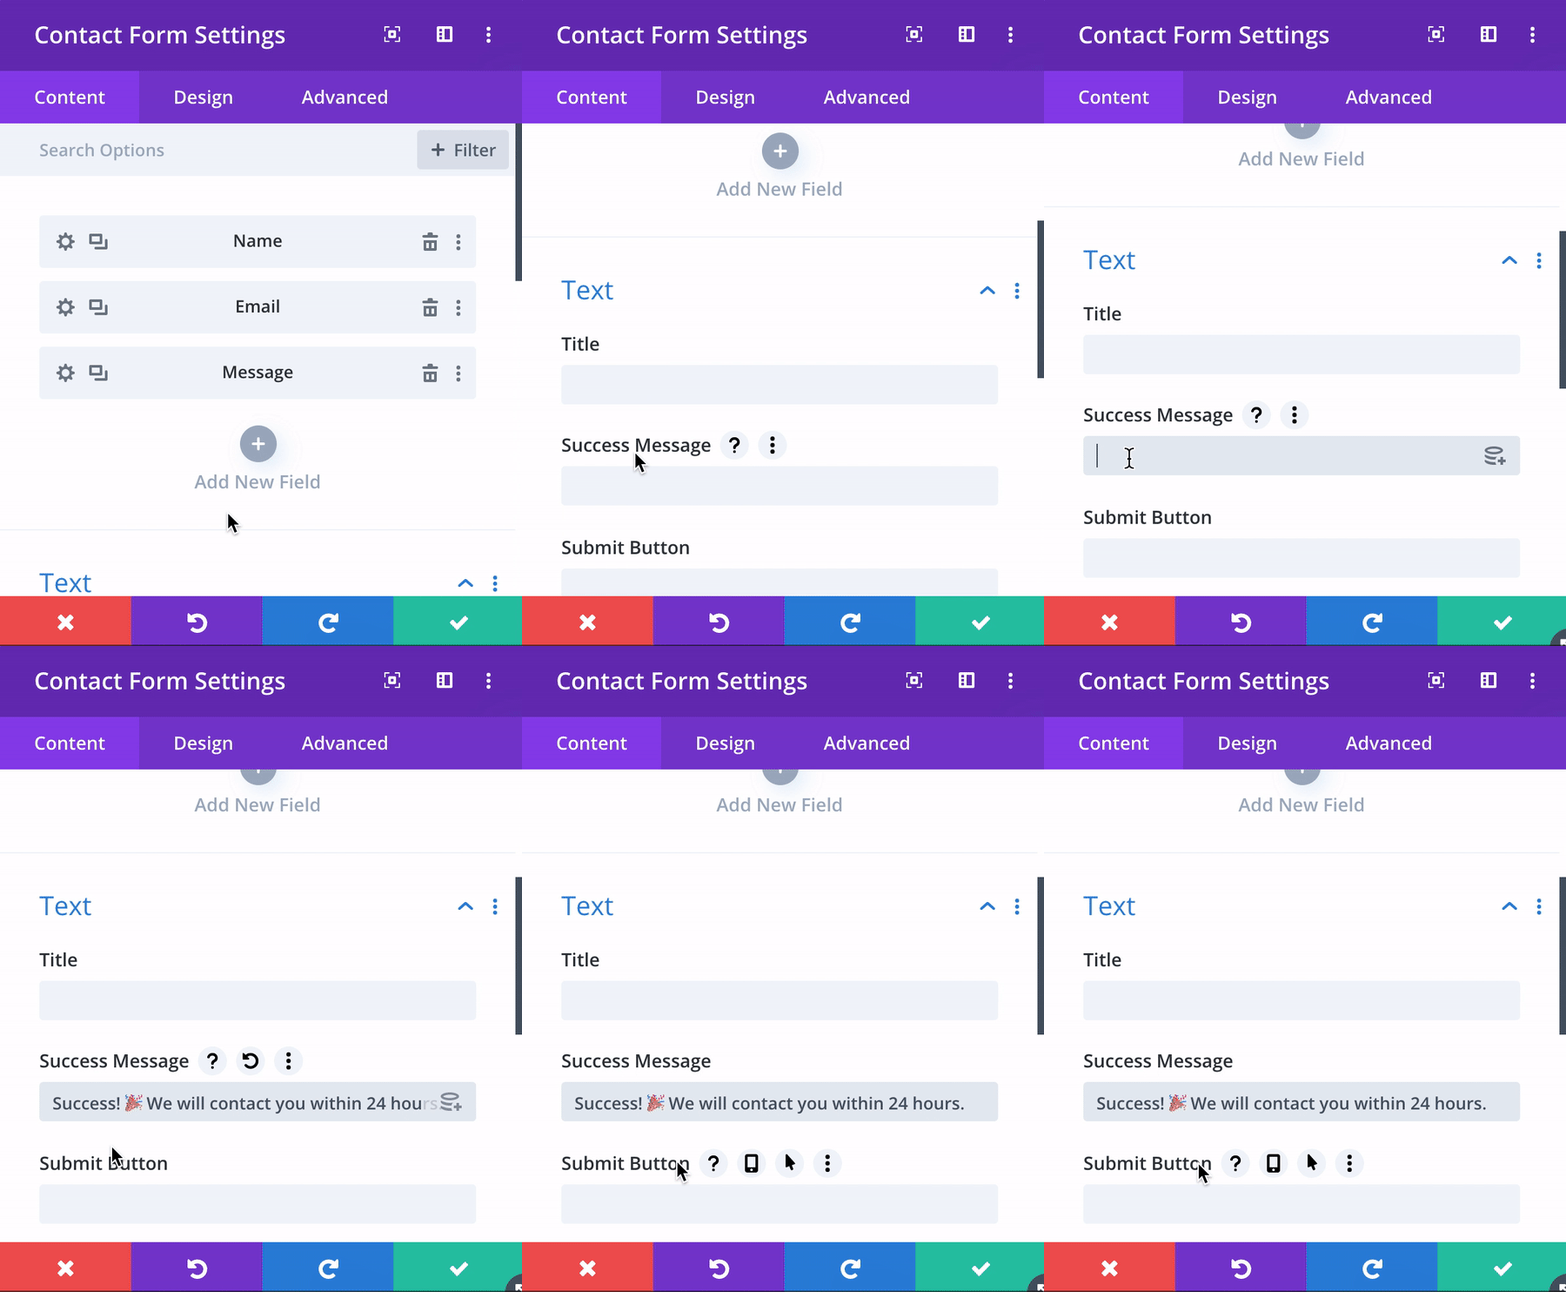
A success message should be short, clear and have positive vibe. You should also let the visitor know what to expect next; when and how will you respond? Don’t leave a potential lead in in uncertainty and make sure that you can keep what you promise.
Add an emoji to create a good vibe but don’t overuse them, unless your target group happens to be tweenies.
Here are a five emojis that can be used in your confirmation text:
| 👋 | 🎉 | 🎉 | ✨ | 🙌 | ⚡ |
If you leave the Success Message field empty, the default copy will be: Thanks for contacting
If you change language in the WordPress settings tab, the default Success Message will be translated automatically.
2. Style your Success Message
When your copy is crisp and sweet, it’s time to add some style to your text and font. It’s easy to miss the small grey default Success Text in the Divi Form. So let’s change that with the Divi Builder, right? Unfortunately not, Elegant Themes hasn’t included this option in the Contact Form Module’s design settings. So let’s create the styling with some custom CSS instead.
How to change the Success Message color and font style
The Divi Form success message uses the class .et-pb-contact-message. We will target it to make the text stand out.
- Go to Divi > Theme Customizer > Additional CSS
- Add the following CSS:
/* Style the Divi Form Success Message */

.et-pb-contact-message p {
color: #32D190;
font-size: 21px;
font-weight: 700;
text-transform: uppercase;
}
Just change #31d190 to the text color of your choice.
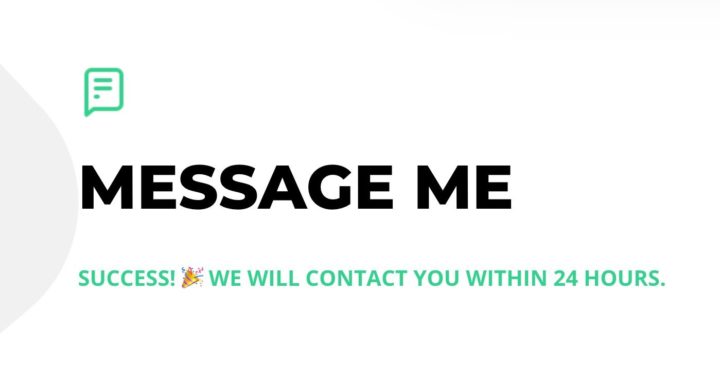
The result:
Center align the Divi form success message
In the example above, the success message will stay left aligned. If you want to center the success message the Divi contact form, just add this little CSS snippet:
/* Style the Divi Form Success Message */

.et-pb-contact-message p {
text-align:center;
}
Voilá, the success message is now center-aligned!
Bonus #1: Add Background Color to your Success Message
Do you want the confirmation message pop even more? Try to add a background color. Since the text isn’t wrapped in a span tag, we need to be creative and use display: inline-flex to prevent the background color to cover 100% of the column width.
Add your background color
- Go to Divi > Theme Customizer > Additional CSS
- Add the following CSS:
/* Add background color to the Divi Form Success Message */

.et-pb-contact-message p {
display: inline-flex;
font-size: 21px;
background-color: #31d190;
color: #fff;
padding: 10px 20px !important;
}
Just change #31d190 to the background color of your choice. You can of course change the white text color #fff to something else.
You can use background color and emojis together, but watch out for conflicting colors.
The result:
CSS Code Explanation:
- Change #32D190 to the color of your choice, for example #000 for black or #fff for white.
- Be careful with the font size; it should look good on small mobile devices as well. You can of course use Media Queries to set different styles for different screen sizes.
- The font-weight can be between 100 and 900 in even hundreds.
- Use text-transform:uppercase; for ALL CAPS.
Related post: How to add a Privacy Policy link in your Divi Form
Bonus #2: Style the Divi Form error message
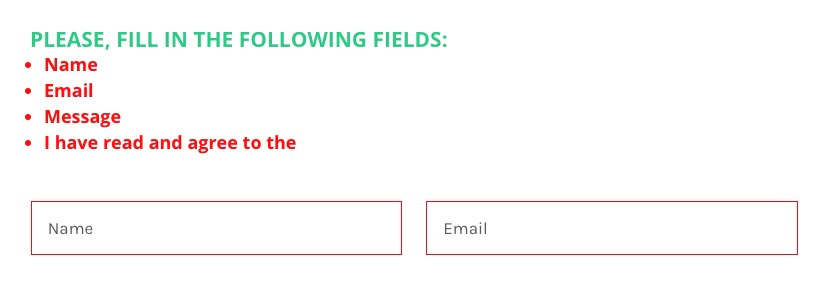
Both the Success Message and the Error Message share the same CSS class: .et-pb-contact-message
This means that the the green color in the success message also will be displayed in the error message title. This is not optimal but this is how the Divi form module is coded so we don’t have much of a choice here.
But to make the best out of the situation, we can change color and font style in the error message bullet list that specifies the errors, by targeting .et-pb-contact-message li
Style the error message
- Go to Divi > Theme Customizer > Additional CSS
- Add the following CSS:
/* Style the Divi Form Error Message */

.et-pb-contact-message li {
color:red;
font-weight:700;
font-size:18px;
}
Just change red to the color of your choice.
The result:
That’s all for today!
I hope that you enjoyed this post. Subscribe to DiviMundo on YouTube and join our Facebook group for more crisp content on WordPress and web design.
👉 Related post: 7 Tips For Better Divi Forms
👉 Related post: How to add a Privacy Policy link in your Divi Form


Great post! Great content on the whole site. Thanks so much for this post on hot to modify the CSS for the success messages. Can’t tell you how much I appreciate how easy you made it and how well designed your site is.
Thank you Kevin, your comment made my day! 🙂
I followed these instructions, but unfortunately now there’s a box above my contact form the color of the success message background. Any ideas?
/*changing the color of sucess message*/
.et-pb-contact-message
{
display: inline-flex;
padding:30px;
color:#191919;
font-size:21px;
font-weight: 700;
text-transform: uppercase;
background-color:#f3e9da;
}
So I figured out it only happens when I use the padding line… I took that out and it goes away, but I would rather use the padding to make it a response box. If you think of any ways to make it work I’d be interested to hear!
thank you
So I figured out it only happens with the padding line added in. I’d like to use the padding line though and make it more of a response box. If you have any ideas as how to make it work, I’d be curious to hear.
If not thanks for the tip and the code! I’ll use a contrasting font color for now 🙂
Thanks for the feedback Cosette! The Divi form module makes this a bit hard by the way it’s coded but I found a rough work around that solves the problem by “hiding” the success message behind the form. Replace the CSS code with this by adding a negative margin to the success message and a background color to the Form module:
Change the background color to the same as you use in the form row. This will only work if you use a single color as a background, not for image or gradient backgrounds.
Let me know if it works for you!
Hey I didn’t see this but this is an interesting workaround. I had hoped to style the shape of the background interestingly using
border-radius: 10px 100px / 120px;
But I may have to just settle for the tiny box not showing lol. I’m getting too picky for not knowing what I’m doing
Thanks for your help Victor. The CSS worked a treat!
That’s nice to hear Doug! I just added a new post on how to add a link to a Privacy Policy page with a consent checkbox in Divi. Check it out if you are interested: https://divimundo.com/blog/add-privacy-policy-link-in-divi-form/
Hi Victor,
Thank you so much!! Really saved my day…been spending ages on this.
One question, my success message is two lines of text on a mobile device and the letters are touching.
Do you have some additional code I can add to add some spacing between the text lines?
Sorry my coding knowledge is minimal..
Many thanks!
Best,
Eliot.
Hi Eliot! Sure, just add some line height with this CSS snippet:
.et-pb-contact-message {

line-height:1.7;

}
Play around with the number 1.7 to find the right line height. If it doesn’t work you might need to !important to override the default Divi CSS:
.et-pb-contact-message {

line-height:1.7 !important;

}
Let me know how it goes!
Hello Victor,
Brilliant – line-height:1.7; did the trick beautifully!
Many thanks!
Best,
Eliot.
Problem is, that also the “You entered the wrong number in captcha” is green. How to make only the captcha message red but keep the success message green?
Hi ZVI! There are some limitations since Divi use the same CSS class for both the success and the error message. But if you use
.et-pb-contact-message pfor the success message, that will not affect the bullet list in the error message. You can then use.et-pb-contact-message ulto style the error message bullet list. For example:.et-pb-contact-message p {color: #32D190;
font-size: 21px;
font-weight: 700;
text-transform: uppercase;
}
.et-pb-contact-message ul {
color:red;
}
How do i target a specific form and not all forms on my site?
Hi Phillip! The quickest way is to add the css in the page settings on the the page where the form is. See #3 at https://www.divilayouts.com/6-options-to-add-custom-css-in-divi/
You can also use the global css in the the customizer (or your child theme styles.css) and target the page id. Read more at: https://www.peeayecreative.com/how-to-target-a-specific-page-or-post-type-with-css-in-divi/
I would recommend the last option since it makes it easier to keep track on all your css tweaks.
thanks so much, that worked a treat!!
Top notch! 👉
Hello Victor
Thanks for your help.
What should I do if I don’t want a success message at all? I selected the “enable redirect URL” option, but it keeps showing the success message before redirects to the page I chosed.
Thanks
Hi Leonel! This seems to be the way the Divi form module works. You could just add a blank space in the Success Message field. But you will still see the form page refreshing before you are redirected to the thank you page (but without a thank you message blinking).
You could send a feature request to the ET support to remove this extra step when a success redirect is enabled (which would be the best UX in my opinion too).
Hey Victor,
A long-time follower and your tutorials are top-notch, you are basically my Divi guru! Thanks a lot for that.
I have one question, in the error message, you can notice that if someone doesn’t agree to the Privacy Policy, in the error message, it display “I have read and agree”. So, can it be rephrased to “Privacy policy” instead of the incomplete sentence? Or any work around it?
Thanks!
Wow, I’ll make sure to put “Divi Guru” on my business card next time! 🙂
Sure, if you open the field settings for the checkbox and type “Privacy policy” in the Title field, that is what will be displayed in the error message. I did just add a blank space in the checkbox title field (to hide the title in the form), which made Divi display the checkbox text in the error message instead.
I hope that makes sense!
many thanks for this information, successfully implemented on my confirmation page using DIVI Contact Form
That’s awesome Daun, I’m glad it worked out for you! 👉
Cannot change colour its still gray
Try to clear your website cache, browser cache and Divi Static CSS files. If it still doesn’t work, It’s hard to tell what’s wrong. The code still works on a clean Divi install with the latest version.
Thanks for the great post! Is there a way to add an image to the success page?
Thanks Debbie! If you choose to redirect the visitor to a success page (instead of displaying the success message) you can style the success page using the Divi Builder. You’ll find this option in the Form module settings.
If you instead want to add an image to the success message, you could do that using custom CSS but I would not recommend that since the same image will be displayed for the error message as well (the success message and the error message share the same CSS class). If you want to try it out, you can use a CSS hack to inject an image before (or after) the .et-pb-contact-message class: https://www.w3schools.com/cssref/sel_before.asp
Thank you very much for this post😄
I was constantly checking contact form settings and other blogs for months to get any solution for this problem.
My contact form has a purple background and grey isn’t much visible when it comes to success message or error message on the form, I was hoping to make it more visible.
All thanks to your blog, I’m now able to do so.
Thanks again!
I’m so happy to hear that this post solved this annoying issue. 🙂 Hopefully, Elegant Themes will add some styling options for the success message in the future, but for now this is the only fix.
Copy-pasted ssyccess message
/* Style the Divi Form Success Message */
.et-pb-contact-message p {
error: EXPECT RBRACE.
color: #32D190;
font-size: 21px;
font-weight: 700;
text-transform: uppercase;
}
ERROR: UNEXPECTED TOKEN }
And i got two errors!
Hi Relika! Did you paste the code in Divi » Theme Customizer » Additional CSS?
If so, there could be some other misconfigured CSS above this code. Try to remove it and paste it again. Also, if the text “error: EXPECT RBRACE.” is in the actual code, it should be removed.
If it still doesn’t work, try pasting all your custom CSS here and I’ll track down the error.
Great Job now even the success message looks clean and designed
It’s all about the details! 😎 I’m glad you liked it.
Thank you guys ! You saved my life !
I’m glad you liked it! 🦸♂️
Perfect! And very clever to add an emoji. Thank you for posting this solution. It would be great if Divi built customization options for the success message into the module – but there’s plenty in that module that needs attention.
Thanks Rob! I can strongly recommend Divi Contact Form Helper that adds a ton of features to the Divi Contact form module. 25% off during Black Friday so check it out: https://www.peeayecreative.com/product/divi-contact-form-helper/?wpam_id=118
This is awesome! Thank you so much! I don’t know why it seems like divi makes every little change so difficult. But in any event – this worked great. However, can you tell us how to change the color of the number box field? When someone enters the number, the color is gray and can’t be seen on a dark background (which so many divi templates use). Thank you!
I’m glad you liked it Erica! Add the snippet below and just change the color from blue to your desired color:
.et_pb_contact_captcha {color:blue !important;
}
Thanks – just what I was looking for. Works perfect.
Cool, I’m glad to hear that! 🙂